Monday, April 27, 2020

Rhubarb Dyeing

Whilst in lockdown the garden has been receiving a lot of attention, especially the areas that have been left unattended for several years. One such patch was the rhubarb bed. The original plants were over ten years old and this year they refused to produce any useable stalks. So up they came and after investigation the roots weren’t even suitable to split and replant they were rotten and woody. So the decision was made to replace with new and I got to chop up the ‘good’ bits for some natural dyeing. I had successfully made a mordant from leaves before but never used the roots. 

After cleaning, peeling and chopping they looked like this.


Next it was time to consult Jenny Deans book ‘Wild Colour’. 

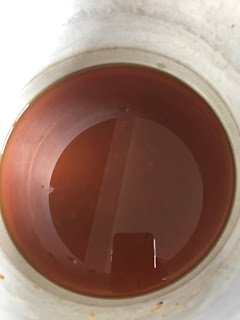
The 600gms roots were brought to a simmer for 30 minutes. 

Meanwhile I prepared fabric. Animal fibres give the best results and although fabric does not require a mordant I chose to mordant my silk habotai and noil with Alum and Cream of Tartar. A piece of 50/50 silk wool mix was not mordanted. 

The wetted fabric was dipped in the dye pots allowing plenty of room for movement of the fabric to ensure an even take up of the dye. The 1st extraction was unfortunately left unattended for enough time to boil which affects the colour changing from a bright yellow to a not unattractive mustard shade. For the second extraction I left the fabric to steep for 8 hours. 


This photograph shows the range of colours I achieved on silk habotai and silk georgette & net, the 4th example is the wool/silk mix. I made two extractions the colour diminishing with each one. Interesting I was able to regain the brightness of yellow with the second extraction. 
The top two were dyed in an extraction from the leaves which were very small. I expected green but again I think they were heated too much. They are, however, a pleasing coffee colour. 
Using iron as a post modifier produced the bottom two olive coloured samples. 


This photograph shows the results on silk noil. Similar comment as above. What an amazing set of colour variation. The one difference here was the piece that I had in my stash that had been previously mordanted in Titanium Oxide, third down, which gave a much deeper brighter yellow. For those who have used Titanium Oxide as a mordant you will know this effect. Again the top two are examples of rhubarb leaves dye but this time I dipped the second one in vinegar. 


This shows the use of iron as a post modifier on three different samples of silk noil. 

Now the samples are collated I know the vat isn’t exhausted yet so I will continue to use it until there is no useable colour left. 


I also post dyed some scarves and gave them a new lease of life. Top is a silk noil scarf and below a crepe de chine scarf both have been warmed up after their dye in rhubarb root.


As a postscript here are the cotton samples I dyed in the rhubarb root. Various types of weave and thickness but all with a pleasant milking coffee finish. The top flowery piece was a surprise. 


If you have found me and are not aware of my Facebook and Instagram pages do pay me a visit for more regular posts.

Instagram. @inspired_textiles
Facebook Inspired Textiles

Thanks for dropping by, it would be great if you left a comment or subscribed. 

Stay safe 


Wednesday, February 26, 2020

Australian stitching project

 It’s been a while since I posted here so here is what’s in my holiday sewing pouch. 

I’m in Sydney on the last lap of our month ‘down under’. 

As I look out over Sydney harbour and the iconic Opera House I am attempting to finish this indigo piece before we travel home. 


I am using up left over pieces of indigo dyed natural fabrics by weaving them, attaching to a base fabric and then slow stitching to hold it altogether.  

I love the variation of colour that can be achieved with different fabrics. I use a synthetic vat, I find it more convenient as I don’t do a lot of indigo dyeing and when I do it is quick and easy to organise. All the threads are natural, cotton and silk. Well known choc ice sticks recycled. 


 I am finding slow stitching is so relaxing and as I listen to some Barbara Streisand I can let the fabric and thread tell me which stitches and tone to use.  If you have liked what you see please hit like and or leave a comment so I know you passed by. 


Friday, August 31, 2018

To view my botanical printing

I have a new blog page dedicated to my botanical dyeing and printing. 

Www.inspiredtextiles.blogspot.com Where I talk in more depth about the processes and techniques.

I also post on Facebook margaretsteeden and Instagram @inspired_textiles where I post regularly my results. 

Hope you can join me on my journey.

Saturday, October 21, 2017

Delivered a range of botanical contact printed silk scarves , cushions and cards to Paul Tavernor gallery in Poynton 

Paul displayed them on a distressed ladder in a corner of the gallery.

Monday, September 05, 2016

Capability Brown - Wallingham

After Eco dyeing a range of natural threads and fabrics I used them in this needle felting landscape to celebrate the anniversary of Capability Browns birthday as part of the nationwide Embroiderers Guild exhibitions. Macclesfield and Glossop EGs came together to display a full range of techniques which is on display at Macclesfield Silk Museum.
This is the view that Lancelot saw each day on his walk to school, no wonder he was inspired to transform the nations landscapes.

Monday, October 26, 2015

Effervescence II

Finished at last and this image shows my piece in situ at textile21's latest exhibition at The Whitaker, Rawtenstall.
The question I got asked the most is 'how did you manage to get it to stand upright?' And every man who studied it had to look around the back. The secret was an acrylic pole.


Here is a closeup of the detail.


Thursday, October 15, 2015

Almost there

Effervescence II is now ready for dyeing. It has been cut out and some surface embroidery added. 
I am at the stage of deciding on the colour of dyes to use. I am leaning towards a cool colour scheme.
Watch this space for more images of the finished dyed piece.